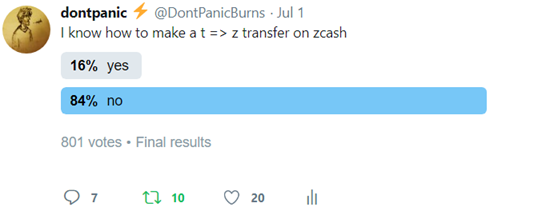
The Zcash value proposition is in private transactions, however, private transactions are not the default and many users simply do not know how to initially create shielded (private) transactions, aka a “t” => “z”. In simple terms, it is important to have a large pool of shielded transactions provides for a larger anonymity set for private transactions; it is harder to pick out any one zebra in a large zeal than it is to point out a single animal in a small cluster. This process, and having more people familiar with it, provides greater value to my work on cross chain atomic swaps (x-cats in zcash speak) so I have attempted to unravel the apparent mystery below. No math, dark magic, animal sacrifice required.
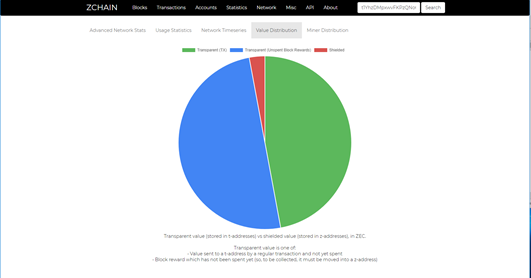
Side note: If you would like to contribute to the greatest good, while exerting minimum effort for the zcash ecosystem, hold you coins in a “z” address. this benefits everyone using zk transactions and increases the size of the anonymity set. Currently, as shown below, this is an uncommon practice.

How

The general process for shielding ZEC is as follows:
- Generate both a “t” address and “z” address
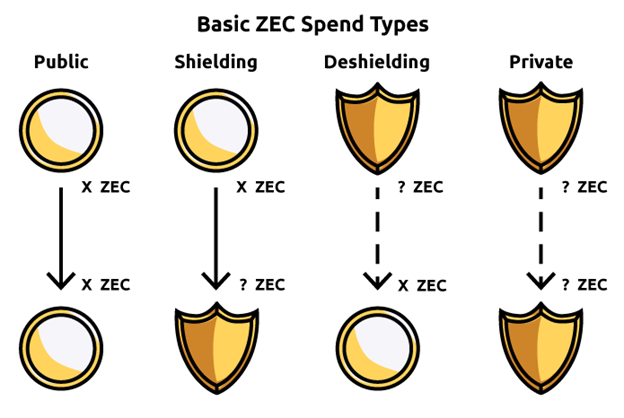
The “t” address works the same as a bitcoin address. When you send from your transparent address the change from the transaction will be sent to a new t address you control and all the transactions will be visible on block explorers. “Z” addresses are the private ones and you will only be able to see the balance in the wallet. When sending to and from a Z address, only the exact amount (minus fees) is sent, the change remains with the same “z” address. No one observing the transaction will see any information about the “z” address, except during shielding and deshielding.
2) Fund the “t” address
Funding your “t” address means sending ZEC to it. Zcash can be traded for or purchased many places. Gemini allows US customers to purchase ZEC with US Dollars.
3) Send from your “t” => “z” using a zcash wallet such as zcashd or winzec
It is actually as easy as that sounds. Sending from “t” to “z” or “z” to “z” or “z” to “t” is all the same procedure. This step is overlooked in the zcash documentation because it is so trivial. Maybe they will add it in future versions to avoid confusion. https://github.com/zcash/zcash/wiki/1.0-User-Guide
Notes
“t” addresses send change to new accounts, “z” notes do not
do not send from “z” => same “t” or the change account, always use a ‘clean’ “t” address when deshielding
avoid sending the same amount into and out of shielding transactions. While 10 zec in and out is less traceable than 2.3123 zec, 10 zec in and a random amount of zec out is better
Methods
Hard
0. Get zcashd running
Get the latest copy of zcashd (https://github.com/zcash/zcash/releases) or use a docker container (docker pull bcrd/zcash)
- Generate “t” and “z” addresses
To generate a t address you use the commands
$ ./src/zcash-cli getnewaddress
To generate a z address use the command:
$ ./src/zcash-cli z_getnewaddress
2 . Fund your t address
Send ZEC to the t address created above
3. Send many
If you are like me, you hate typing or even pasting long inscrutable numbers. In linux you can save strings with shortcuts like this:
TADDR=”yourAddress”
But actually type or paste your address. after that you can recall it by typing the letters with a dollar sign in front of it:
$TADDR
So assuming you funded your t address with 1.001 zec the `z_sendmany` command will allow you to shield that value:
$ ./src/zcash-cli z_sendmany "$TADDR" "[{\"amount\": 1.0, \"address\": \"$ZADDR\"}]"
Be mindful of the quotes and backslashes, they matter.
This will return you an opid code which is used in your wallet for tracking the shielding process. You can check the progress using:
$ ./src/zcash-cli z_getoperationresult
Status success is what you are wanting. After you get a success you can verify the funds using:
$ ./src/zcash-cli z_listreceivedbyaddress "$ZADDR"
Easy Mode
0. Get winZec
Download the “unofficial” windows version of zcash. It can be found at http://winzec.com/
1. Create addresses
click the new T (transparent) address button
click the new Z (private) address button
2. Fund
Fund your “t” address
3. Send

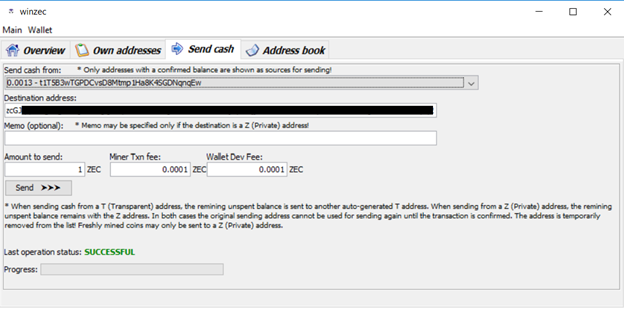
On the send cash tab, select your funded t address. enter your z address in the destination address and the amount to shield.
Click send and watch the progress bar to see when it completes
That’s it!
Note: When you are sending, there are two fee boxes. The first is the network fee, you must pay this to have your transaction included in a block. The second is the wallet dev fee, this is an optional donation to ralfstx to support the windows and mac wallet development. If you have used both methods, you will quickly realize the importance of gui and its continued funding. Open source development is often a thankless process, so money is always nice way of saying thank you.
Tips:
zchbDpcotZTCScgwa2HU2hxhn62yebYphrwDhpK43YAeo158Mo5R8ACiJY1nFjeeMUBf6JYGCoH4Yx4b8YvDW7r5dKtGWnv

